You know that reporting server? Runs those PowerShell scripts to grab custom reports, add group prefixes and other general 365 maintenance tasks? Uses that global admin password that is exempt from MFA because it needs to run these scripts or uses a highly privileged ClientID/Secret? Means anyone that can get access to the drive with the scripts in can effectively run commands just by inserting them in the script on disk? Yeah you know the one.
We all want rid of those servers, hell if you’re like me you want rid of ALL servers and have everything run header-less with no exposed Infrastructure at all. A nice way of running all of those scripts up in the cloud with no local infrastructure, no managing a server and network and all of that.
Azure functions sort of fill that gap but it has some pretty serious limitations and needs a fair amount of work to pummel it into a solution.
First step is going to be creating a function app and a local environment.
Issues and Limitations
There’s a lot we can do with Azure Functions and PowerShell but the main reason for doing them is we all know PowerShell, we all have at least 2 OneNote books (the one we share and the one we dont) full of scripts that do all sorts of neat stuff. To use our hard earned knowledge and scripts we all use modules. MSOL, AzureRM, AzureAD, EXO, SPO, Teams, and the rest.
So limitation #1 with Azure functions – We need 32 bit modules. Even if you use a 64 bit platform the 64 bit modules fail as apparently the underlying .net exe is 32 bit. There are some ways and means and Ill make another post on how to scrounge together something workable shortly. For now we need to get our functions and local environment setup. That probably sound straightforward.
Next we have connectivity. Ideally we are going to want to use a nice app and clientID/Secret with exactly the correct rights but due to the above scrounging we are likely to have to use a user account for some stuff.
Third issue is run time – there’s a 10 min maximum function run time on consumption plan functions and premium or dedicated plans require cash money. At that point you’re writing a business case for the removal of the reporting server and associated costs and risks in exchange for implementation of all its tasks as azure functions – which given the previous limitation might be possible. So try to stick to 10 minutes, we’ll look into that too.
Create a Function App
Lets not mess about then, into portal.azure.com, go to Function App hit Create a Function App. This is the wrapper for your scripts, its name has to be unique and you might want to use for other stuff (we can post to it from flow for example, I’ll write something another time) so make it sensible and fairly descriptive of what its form not just “MattsStuffFunction01” for example. We want powershell core run time, 7 is fine and not every region is available so pick the best for you:
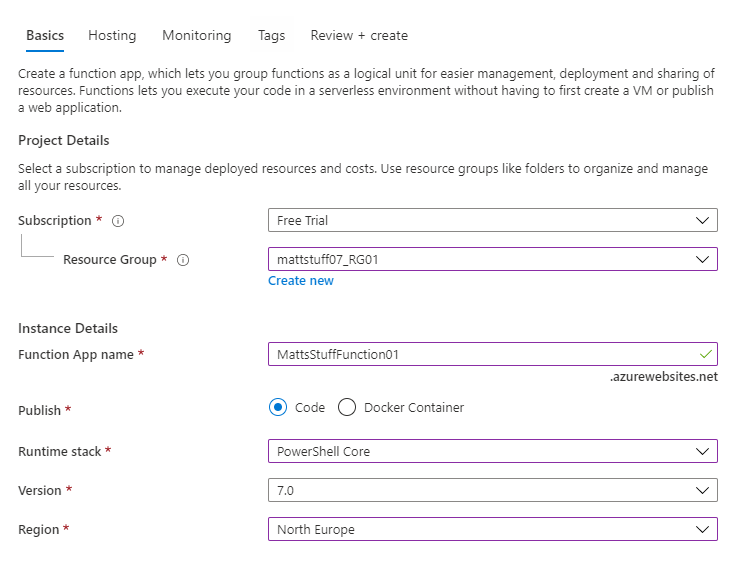
Hosting wise, if you have a storage account you want to use great otherwise create one, OS should be windows and plan is consumption. Can turn on application insights if you want, I generally dont unless there’s a specific requirement.. Tags will be as per convention in your tenant. Basically in test you can follow the wizard and just hit go with no wrong answers the right answers will be driven by tenant design and control decisions and should not affect anything we are going to play with. Once you hit create wait a bit for it to set up the resources then we’re off and running.
Create a function
Okay so our aim here is to rebuild reporting.config server “stuff” into function apps. At the moment then we arent going to be taking inputs or looking at triggers other than timers. Again Ill doubtless write something about this later.
Our Function App current looks ike
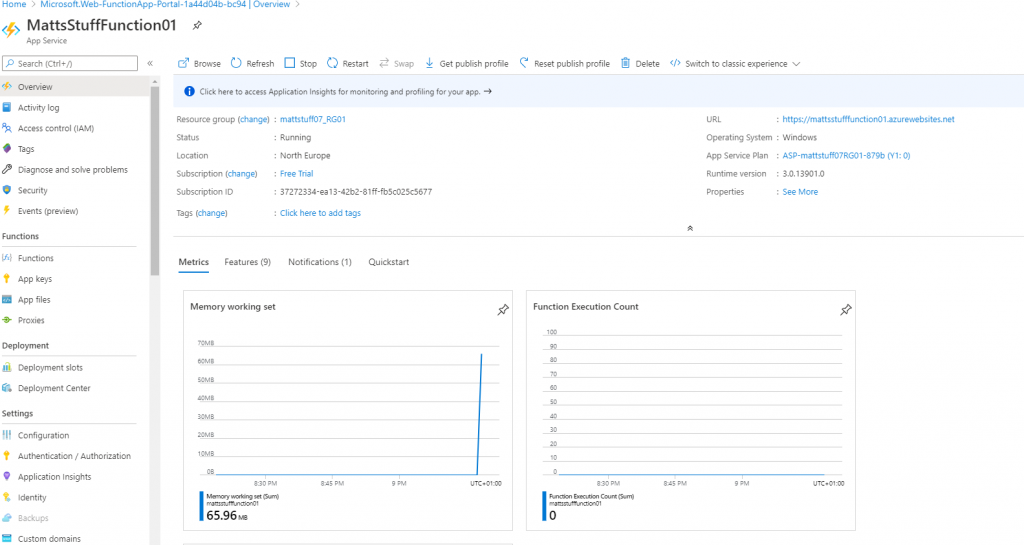
The app bit is great but we don’t have a function.
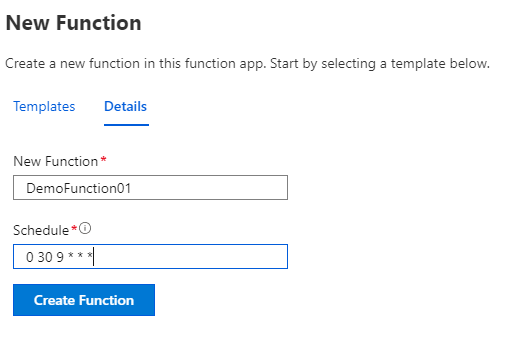
Click ‘Functions’ then ‘Add Function’ and well see a veritable smorgasbord of triggers, we want “Timer Trigger” Its going to want a name – remember your app can hold a tonne of functions so give it a sensible descriptive name certainly nothing like “DemoFunction01”.
You have to specify the timer schedule as a cron function presumably because someone at Microsoft wins a dollar every time someone googles “cron function”. Its not as bad as it looks, basically you have 6 spaces from left to right meaning seconds, minutes, hours, day month and day of week and fill in when you want your function to run. For example if you want it to run at 9 30 am we stick 0 in for seconds, 30 for minutes, 9 for hours, * for every day, * for every month and * for every day of the week:
0 30 9 * * *
You can do many more exciting things should you want to we don’t, here’s my setup:
Run Some PowerShell
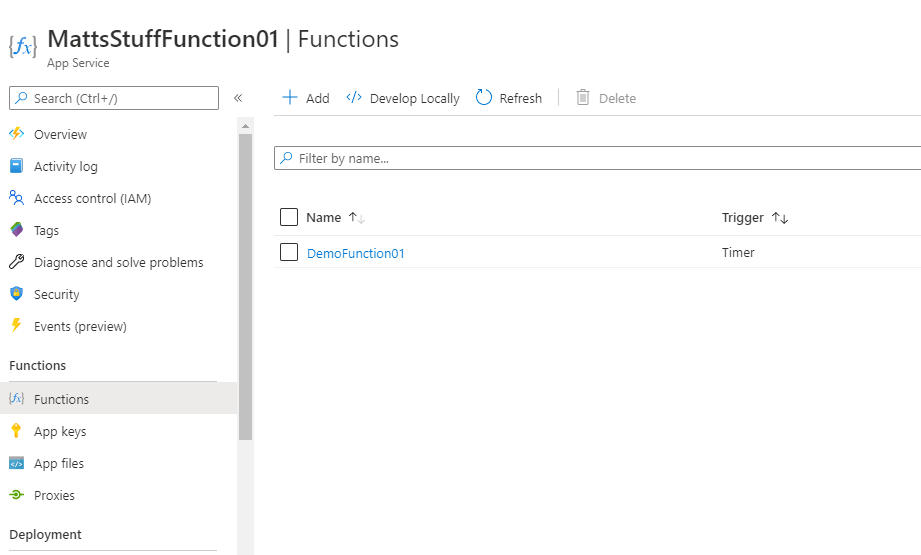
The Function will create pretty quickly and you’ll end up here:

So lets have a look what we can do in our function app. Click Code and Test. Expand Logs and drop App Insight Logs to select filesystem logs. Accept the whining about performance impact right now we dont care.
Dump the demo script MS have created and just stick in:
# Input bindings are passed in via param block.
param($Timer)

# Get the current universal time in the default string format.
$currentUTCtime = (Get-Date).ToUniversalTime()

Write-Host "Hello World"
Then hit save and Test. You’ll see the log go through the host start up and eventually run the function and and output a line
2020-07-26T20:40:32.817 [Information] INFORMATION: Hello World!F-yeah we’re running powershell without a server!
Setting up your local environment
It will not have escaped your notice that trying to design, test and use powershell scripts in this manner would be…a poor experience. We need to set up a local test and dev environment that lets us mimic the capabilities of the app.
This used to be a genuine pain in the neck but MS have changed the Function Apps blade and included a little guide on how to do this. So go back to the Function App blade and click function again, you’ll see your new function listed
Click the wee develop locally button and a pop out will tell you all about setting up a VS Code environment. Basically –
- Install Visual Studio Code Click Here, hit download for windows, run the exe, install accepting all the defaults
- Install node.js by going to here and installing the 32 bit windows installer version. Again accept the defaults, its actually just npm we want but pitter patter
- Start a command prompt and run
npm install -g azure-functions-core-tools
This should go off and get the Azure Functions core tools. - The guide says and always has said to install .NET Core 2.1, it’s now in long term support and I’ve found you actually need SDK of 2.2 from here, again windows installer x86 then run the exe.
- Install the Azure Functions extension for VS Code from here, it’ll need to open vs code, let it do its thing.
- This bit diverges from the guide but I’ve needed to do it 3-4 times to get around an issue in VS Code – Manually download PowerShell PowerShell-7.0.3-win-x86.msi, accept the defaults. This gets around an issue where PowerShell never finished starting in VS Code so you cant debug locally.
The other thing you may want is Azure Storage Emulator. This lets you run your scripts entirely locally otherwise you need to attach to a storage account. I highly recommend this although it uses sql the install process is 10-15 minutes.
- Go to here and download SQL Server Express 2019. Run the download, select Basic and it will download the installer package and install SQLEXPRESS
- Next go to here and get the standalone installer for the Azure storage emulator. (You can use an actual storage account but that’s pennies, this uses local resources but does require SQL, which can just be the localdb ) Open a command prompt and browse to
C:\Program Files (x86)\Microsoft SDKs\Azure\Storage Emulator>
Then run
AzureStorageEmulator.exe init
It will poke around looking for a sql instance, find SQLEXPRESS and install into there. - Now you can run
AzureStorageEmulator.exe start
Writing a PowerShell function in VS Code
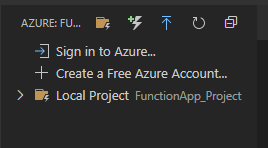
If you do the above VS Code is open, restart it and then usually do it again so that on the right you see the Azure icon ![]()
We should now see:
Click that Azure icon and hit “Create New Project”. Make a nice new folder, give it a sensible name so when you need to find it in a year you know what it does. Don’t just call it FunctionApp_Project or anything non-specific.
VS Code will ask you for the language (PowerShell), Template, TimerTrigger, Name (something specific again, not “DemoFunction02”), cron trigger (as above I’m using 0 30 9 * * *. Open it in the current window.
It will quickly run up a function and the associated files for you, then land you back in explorer view. You will also notice VS Code offering you extensions for the ps1 file type on the bottom right of the screen, install it then close the Extension: PowerShell tab. It’ll check the syntax and let you tab-complete commands.
Back in explorer view if you go to run.ps1 this is your PowerShell script that will run when the timer hits.
Replace the whole code with
# Input bindings are passed in via param block.
param($Timer)
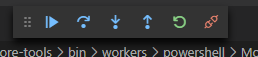
Write-Host "Hello World! I wrote this locally"Then hit the play button in the top right corner. You are going to be prompted for a storage account just use a local emulator. It will then start the function app. Make sure you have the terminal window open at the bottom and you should see:

Our Function runs off a timer so if you want you can wait until 0930 to see it run, or you can click the Azure symbol on the right, expand out until you see the function and right click it to Execute it immediately

Once you hit this you will see it generate a worker output but what we need to notice is that the debugger has paused the script:
Hit Play to continue and it will execute:

The exciting bit is that INFORMATION:line with our Hello World string.
Okay now we just need get the function app into azure. Click the Azure icon again and hit the upload icon on the mini-menu bar
Follow the prompt to sign in and you’ll end up back at VSCode then you can select your function App created earlier

Accept the overwrite warning and let it deploy.
Back in portal.azure.com we can go to the function apps blade and youll see you have your new function. We can now write and test locally and deploy to azure.
In the next exciting instalment we can look at the modules that we can get together and some stuff we can do to migrate our reports.
![]()